Franken-bator – Part 1 (Making of)

Back in November (2017), I bought two of these 56 egg, brandless, yellow topped Chinese incubators on eBay. After a refund for some shipping confusion, I spent around $85 for the pair of them. I was really pleased that they came with turners and I ran a test hatch in each one with 1 dozen eggs.
IMG_6361.JPG
The hatch, was less than spectacular. I hatched 5 out of the top incubator, and 1 out of the bottom. I assumed the bottom incubator just didn’t work well that close to the floor (this was during a cold snap) and didn’t think much else of it. When I tried using them again, the incubator that had been closer to the floor was discovered to barely work. It didn’t maintain temps well enough to keep eggs alive and developing. So I started using the other one to incubate eggs, and that didn’t work so well either. Because it was hard to keep the humidity low enough for the first 18 days without the thing beeping like crazy. I tried resetting and it didn’t work. After this, I bought a Brinsea Ovation 28 EX for my starter incubator (LOVE IT!!!!) and I started using it as my lockdown incubator, since high humidity didn’t matter for the last 3 days. This worked well, but after a month of this use, it started misbehaving more often.

So I decided to gut both these machines and retrofit them with Incukit Minis. I also decided to spend the extra $9.99 to get the 5rpm Egg Turner Motor for the Incukit MINI and retrofit it to the turners with this motor.

I converted my first incubator last week, and after some trial and error, I got it working perfectly. I’ll go into that later in the tutorial. I decided to document the second incubator conversion once I had most of the kinks worked out.

The first thing I had to do was to take the old guts out of the incubator. I unscrewed the grid, and clipped the zip ties that were holding parts to the grid.
[​IMG]

Here you see the the hygrometer, the fan, the turner plug, and the thermometer.
[​IMG]

I unscrewed the fan and the heating element was located underneath.
[​IMG]

I was surprised at how small the heating element was.
[​IMG]

Next, I removed the 4 spacer brackets that kept the heating element off the lid. I presume to keep the element from melting the lid.
[​IMG]

I then removed the 8 screws holding the face plate to the lid.
[​IMG]

I clipped all the wires as close to the circuit board as i could get. Who knows when they might come in handy again. I could have also removed the circuit board, but I decided to leave it. I don’t ever see the need to use that again.
[​IMG]

The size difference in the fans is interesting (Incukit on the left, old fan on the right).
[​IMG]

The heating elements for the Incukit are really interesting. They are these 4 grey tubes. The fan blows air up and over them carrying the heat throughout the box.
[​IMG]

I centered the mounting template under the lid so I could mark the hole I needed to cut for the display and buttons.
[​IMG]

I used a 1/2″ drill bit to make holes in the corners of the display hole.
[​IMG]

I used this sawzaw blade with a handle to cut between the drilled holes.
[​IMG]

This did a good job of cutting the center out, but the unit needs to lie flush with the top of the incubator, so most of those 4 ridges and the screw sockets had to go.
[​IMG]

I used my drill to shave the screw sockets down to the level of the lid.
[​IMG]

You have to be careful not to go too quickly, but it works better than shaving them down with a knife.
[​IMG]

A very sharp utility knife works very well for carving away the ridges and cleaning up the remnants of the screw sockets
[​IMG]

It takes a bit of time and patience, but it can be done.
[​IMG]

I drilled this hole through an air vent grid on the top of the incubator and cleaned it up with the utility knife. The purpose of this hole is so I can drop a temperature probe of a test thermometer without lifting the lid.
[​IMG]

I cleaned up the edges of the main opening with the utility knife. I then made two holes for the mounting screws.
[​IMG]

The unit mounted in the hole perfectly.
[​IMG]

This is where I screwed up a bit. I had forgotten to drill a hole for the power cord for the Incukit until after I had mounted the kit. So I got a 1.5 inch hole saw and tried punching through. Since I wasn’t able to lay the lid down flat on the board I was working on, I punched through and the plastic cracked.
[​IMG]

When the plastic cracked, the down control switch off the unit hit the table top and broke. My solution, use a toothpick to use the controls.

Note: After I finished the construction, I contacted Incubator Warehouse to ask how I could fix the problem and they are sending me a replacement unit. YAY!
[​IMG]

The next step was to fit the new turner motor, to the turner base. This is the original setup. The motor is attached to the metal mount, a shaft sticks through the mount and turns an arm, the arm rocks the turner cradles back and forth to turn the eggs.
[​IMG]

The new turner (on the bottom) is smaller than the original turner, so it couldn’t be screwed into the existing holes on the mount.
[​IMG]

One nice thing, the shafts are both the same diameter, 5mm. So the original turner arm fits perfectly onto the new motor.
[​IMG]

However, the shaft for the new motor is almost 3/4th of an inch longer than the original motor.
[​IMG]

Since the workings of the original incubator were in the lid, the wires for the original turner motor were pretty long.
[​IMG]

It also had this handy connector so you can easily disconnect he turner when it comes time for lock down.
[​IMG]

The new motor had a couple of problems. First, the wires running to the Incukit unit were too short. Second, since the Incukit is going to be behind that mesh grid that is screwed into the lid there is no easy way to disconnect the turner when it is time for lock down.
[​IMG]

So, I decided to splice the wires from the original motor into the wire for the new motor. Since both the wires running out from the original motor were red, I ran a black sharpie down the wire that connects to the black wire on the new motor and to the black wire above the quick connect joint.
[​IMG]

So, first, you clip the wires and strip them. Then I held them next to each other.
[​IMG]

Then I twisted the wires together.
[​IMG]

Since I didn’t have any wire nuts to hold the wires together, I folded the twisted wire back against the wire shielding.
[​IMG]

And I wrapped the wire connection in electrical tape.
[​IMG]

One problem with the way I connected the wires above, is that with a firm yank, the wires can be pulled apart (I did this accidentally to my first Franken-bator conversion). To prevent this, I held the two wires together, and wrapped them with electrical tape above and below the join.
[​IMG]

And now, I have a longer turner wire with a quick disconnect.
[​IMG]

I then plugged the wire into the Incukit. At this point, I attached the protective plastic mesh back to the lid as well since I didn’t need access to the inside of the lid any longer.
[​IMG]

In order to make the new turner motor work. I had to take two different things into account, how to take up the extra 3/4ths of an inch in length on the turning shaft, and how to mount the motor. Fortunately, one solution takes care of both, a 3/4″ thick block of wood. I screwed the block onto the mount, using the holes for the original motor.
[​IMG]

I drilled a hole through the block for the shaft.
[​IMG]

I put the shaft through the hole and mount it to the block using its mounting holes.
[​IMG]

And now the turner arm sits right where it needs to be.
[​IMG]

Here is the retrofitted turner in the box.
[​IMG]

It is now attached to the wire connected to the Incukit. The black wires hanging down are connected to the temperature probe from the Incukit.
[​IMG]

I use the original foam packaging to insulate the bottom of the incubator.
[​IMG]

After I cut a window for so I can view inside the incubator.
[​IMG]

And this is when I started testing my first build. The Incukit instructions say to check on how much your heater elements are being utilized to check if your incubator box is either 1) too big and/or 2) not well enough insulated. When I first tested the incubator in this configuration (with a smaller power cord hole). It took almost 3 hours for the incubator to get up to temperature. Once it got there, the Incukit had trouble maintaining the temperature, and kept dipping down into the 97-98 degrees F range. The instructions say that it is best if the heating elements are being used at less than 65% capacity most of the time. In this configuration, the lowest utilization I saw was 85%. So, the box is either too big or not well enough insulated.
[​IMG]

So, I went out and got some 2ft X 50ft Reflective Insulation which is basically metallic bubble wrap. and made a lid cover out of it. After I added this cover, the heaters usually hover around 50-56% capacity and spike up to 85% occasionally. After lifting the lid, it can jump to 100%, but that is okay for short periods.
[​IMG]
I used double sided foam tape to adhere it to the lid, and I cut the corners and folded them around the corners and stuck them together using packing tape. I intended to get more pictures of the process, but I forgot until I was almost finished.
[​IMG]

I also put a piece of the insulation in the window to retain the heat there as well.

After everything, I spent about $230 on two 56 egg incubators. Not bad considering I paid over $400 for my 28 egg Brinsea.

Spring Chickens

I got a call a week ago today from the breeder from whom I had ordered Delaware chicks for June (as discussed in the this post). Well, he had a larger hatch percentage than he anticipated so our smaller order of 16 chicks jumped the line and they are ready now. *AAAHHHHH* We were not ready at all. I thought we had another month AT LEAST to get ready for them. So we had to do some rushing. I told the breeder that we would pick them up on Saturday. We wanted to order New Hampshire chicks to raise with the Delawares. Even though this means more chicks at once, it is a WHOLE lot less work than raising two separate batches of chicks and trying to introduce them later. So, Cackle hatchery has what they call their Free Range New Hampshires. These birds are kept on pasture and fed only Organic, non-GMO grain. So I ordered a straight run of 16 of these chicks to be delivered ASAP. I got a call from Cackle the next morning and they said they could send the chicks that day and they would arrive on Friday. PERFECT! So they sent them. The post office called Friday morning and said the chicks had arrived in town. Our postman offered to bring them to us. Because it wasn’t cold, David had already left for the chiropractor, and I had to work that morning. I took the postman up on his offer. When I got a break from work and the baby was asleep I scrounged up a box and lined it with trash bags. I then realized that I didn’t have wood chips or starter feed for the chicks. So I had David run to the nearest Tractor Supply for Organic starter feed and wood chips. I don’t normally like giving the chicks this feed as it has soy in it (soy is a cheap way to up the protein content of feed but it ads little other nutritional value), but we can only get a supply of the whole grain feed once a month from our Azure Standard order. So, the best we can get (for now) will just have to do. So, the New Hampshires arrived and they were much more lively and very willing to be held. They seem to be more people friendly than the buffs were at this age. We ordered 16 of them, but received 18. Yay for free chickens!

New Hampshire - Parcel

I wing sexed the New Hampshires and they all looked like they were pullets (females) which is fine by us, though I would like at least one rooster so I can keep the pure bred New Hampshire strain going.

New Hampshire - box

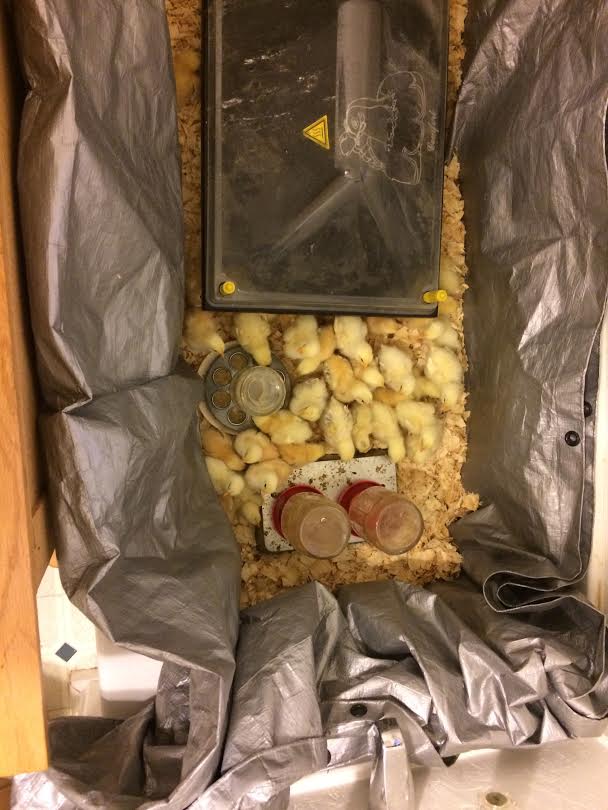
On Saturday, we went to the breeder farm to pick up the Delaware chicks. It was a 4 hour drive each way, but well worth it. These chicks were 5 days at this point and VERY lively. Since we were the last people to come and pick up Delawares, the breeder threw the extras for free. Again we ordered 16 and received 18 birds. Yay! Because of concerns of crowding, we moved the chicks out of the box and into our bath tub which doesn’t work properly at the moment. The two batches of chicks integrated seamlessly, no fighting, no fussing, despite the cramped quarters.

Chicks - tub

I was worried when I first saw the Delaware chicks that we wouldn’t be able to tell them apart from the New Hampshires until they feathered out (Delawares will be white with black neck, tail and wing markings and the New Hampshires will be red with roosters having a green tail). However, the New Hamshires are a red-ish yellow, and the Delawares are a lemon yellow.

(NH on the left, Delaware on the right)

The Delawares also can have spots on their heads, which the New Hampshires do not have.

(NH on the left, Delaware on the right)

We also have had no problems except for one chick. Sunday night, I was refilling their feed and water before going to bed and I found a New Hampshire chick on it’s back breathing in a labored manner. I picked it up, put water into my palm and dipped it’s beak in. The chick immediately perked up and started drinking. When the chick seemed more steady, I put it back in the box near the food and water, expecting to find it dead the next morning. Yesterday morning, I didn’t find any chick bodies and all the chicks seemed alert and perky. I was only able to tell which chick I had revived the night before because of where it had been pooped on  while lying on it’s back. It had a mild case of pasty butt, so it got a bath and a blow dry and was put back. I now cannot tell which chick it was and none of the other chicks have gotten ill or died either.

I was not able to wing sex the Delawares because they were too old and their wing feathers had grown too much to tell. I’ll try sexing them by tail feathers later this week.

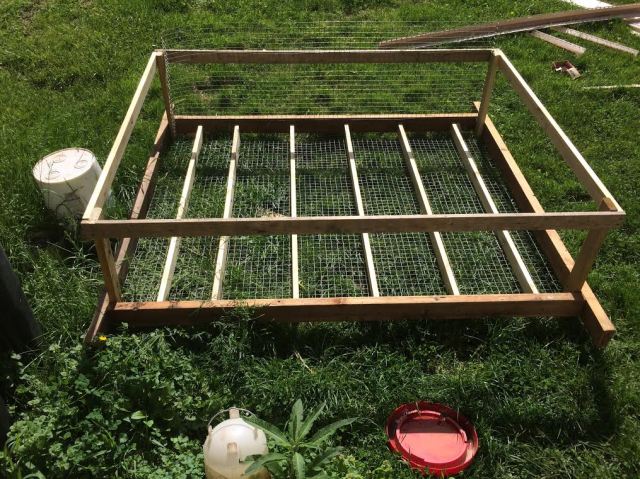
We know the temporary tub brooder will not work for long. In reality, they are too cramped already. We are working to get the Buffs out of the broody house and into a grow-out pen. We purchased the electric poultry netting and it should be arriving within a week. Yesterday, I had a slow day at work and Grace had off. So we worked on constructing a mobile coop with the materials we had on hand. For the bottom frame of the coop, we used some 2x4s that my dad had salvaged when he dismantled the gas shack. For the roosting bars, we used the slats from a busted full sized bed frame. We already had the 1 inch galvanized wire on hand for the bottom and sides. and we used scrap wood from the siding job and more bed slats for the top and the feet to keep it off the ground. We are planning on using left over vinyl siding to keep out the wind, and some leftover green roofing to keep out the rain. We may turn this into a “chickshaw” later, but for now, we are hoping not to spend any extra money on this coop.

Grow out coop

I was hoping to get further into building the coop yesterday, but I stood up from a crouch and “grayed out” and fell over. I believe I may have even lost consciousness for a moment because I had no idea why I was falling. In the past, if my knees gave out because of a “gray out” I have always been aware in the moment that it happened because of the “gray out”. I also went over like a tree and landed flat on my back rather than having my knees buckle. Luckily, the ground was soft and wet and I didn’t land on a stone or concrete. Still, it was not a fun experience. I feel like I was in a car accident. The consensus is that, the heat, dehydration, and nursing a baby (which can contribute to dehydration) were all working against me. Hopefully we can finish the project before the fencing comes, without any more mishaps.

I also came to the realization yesterday that we have 78 chickens on the farm. We will definitely be eating a good number of them. But until we start breeding the buffs and the chicks, no more chickens!

Ten Weeks – Pullets vs. Cockerels

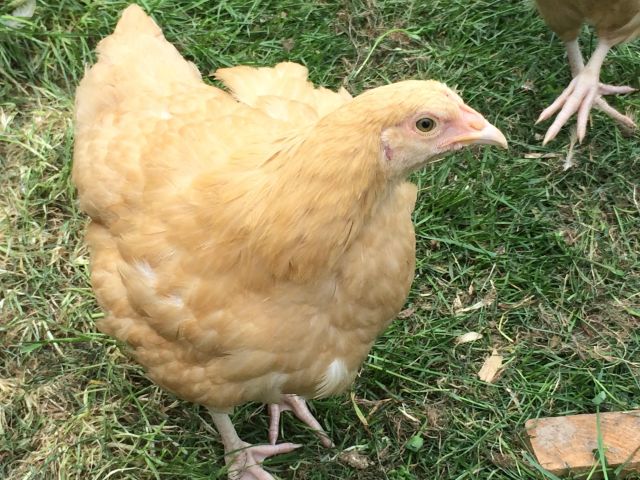
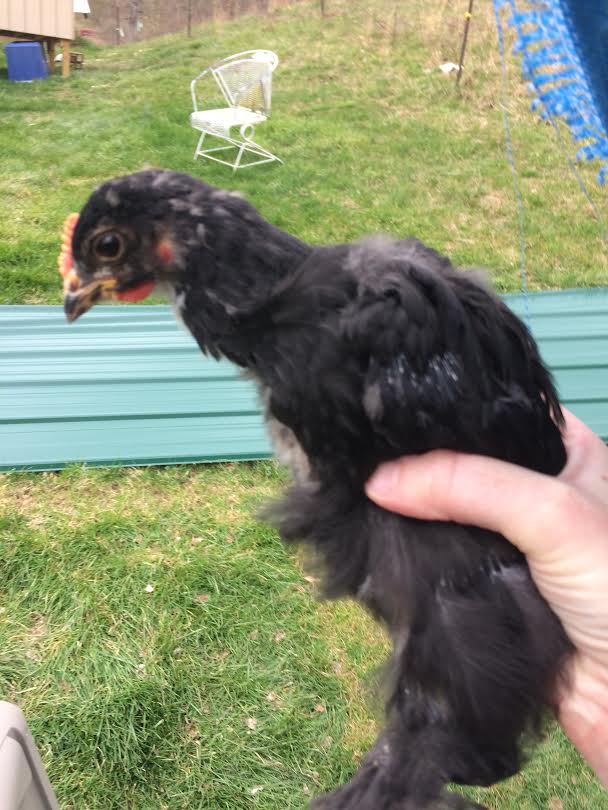
Our buffs are now 10 weeks old. They are now half way to “maturity” for this breed, which is considered to be 20 weeks. However, now is a great time to check up on how many of my chickens are pullets (young females, not yet laying) and how many are cockerels (young males). You can tell this pretty well at this age because of the secondary sex characteristics. This still isn’t an exact science at this age, but you can get a pretty good guess. If a chicken is a pullet, at this age, she will generally have a smaller, paler comb and wattles. You can see this very well on the picture of this little cutie.
Pullet

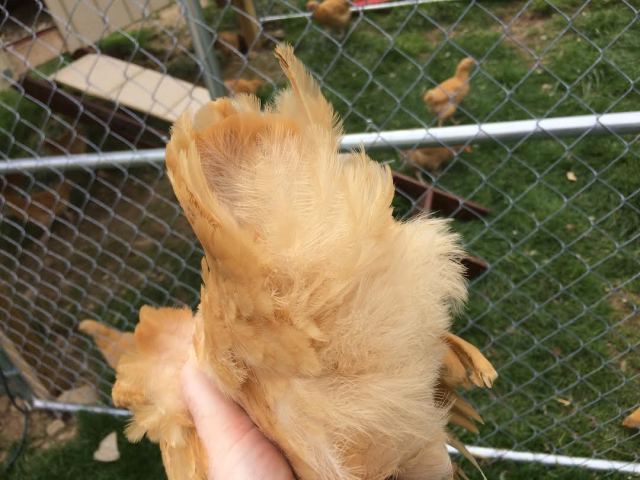
You will also see well defined tail feathers on a pullet as well.

Tail - pullet

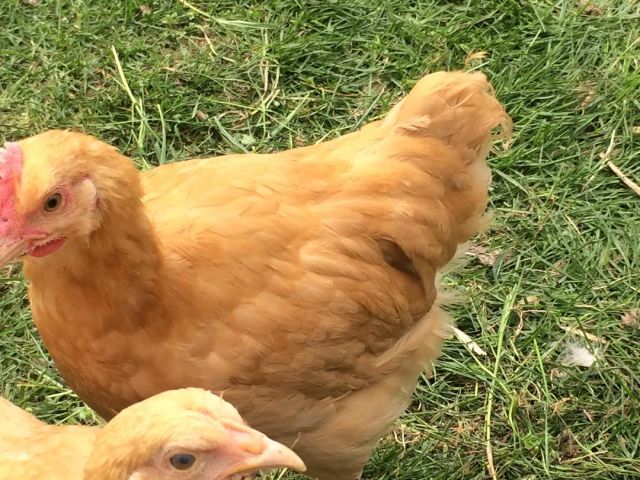
A cockerel, on the other have will have a more developed and red comb and wattle.

**Sorry for the poor picture, I didn’t get a good shot of a cockerel’s head, but this shows what I’m talking about.**

Cockerel - tail

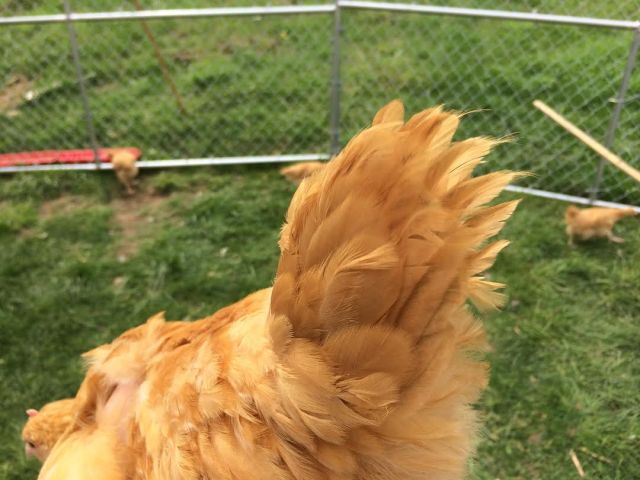
Their tail feathers are less defined on their edges and more pointed and tend to be droopy.

tail - Cockerel

One thing I found interesting, a few of our cockerels have darker, secondary tail feathers. I’m sure that doesn’t meet the breed standard. You can see the droopy, primary tail feathers, that denote a cockerel, above the darker ones.

Tail - Dark

According to the current count, we have – drum roll please – 13 Buff Orpington Cockerels, 12 Buff Orpington Pullets and one Black Cochin Cockerel. These totals aren’t totally set in stone, yet, but it shows that the numbers are fairly well balanced. I believe that more of the 6 chicks that died initially were mostly pullets since we had a higher pullet count to start with.

As you may have noticed in the background of some of the pictures above, we now have a door for the Buffs to get out into the run. Hopefully this will make our morning and evening routines MUCH easier.

Door

The buffs are also starting to hit their more rebellious “teenage” phase. They did not appreciate having their pictures taken.

scratch1

Spring has Arrived

Spring is finally here to stay, or so it seems.  The weather has been gorgeous the last two days. The chicks are eager to be put out on grass every morning. The normal greeting committee has increased from 3 to 8 chicks, with more jostling for position on the wall (see the chick trying to fly up on the left of the photo). I’m now having to shut the interior door of the coop now because they were roosting on the feed bin and pooping that up.

GCS

It has also been confirmed that Rambo, our bonus rare chick,  is not a Silkie. Black Silkie Bantams start growing a puff of feathers on top of their head well before this time and he has no sign of having a puffed head. The consensus on the Backyard Chickens form post, where I asked what he was, is that he is a Black Cochin. Since Murray McMurray doesn’t have Black Cochin Bantams, and he doesn’t look like he has frizzled feathers. I believe he is a full sized Black Cochin. This is better for us if he is a Cochin. The regular sized Cochins are fairly large, cold hardy birds, that have a good disposition. From what I’ve seen, he doesn’t have as good of a disposition as the buffs though. We will have to wait an see if the guess is correct.

side2

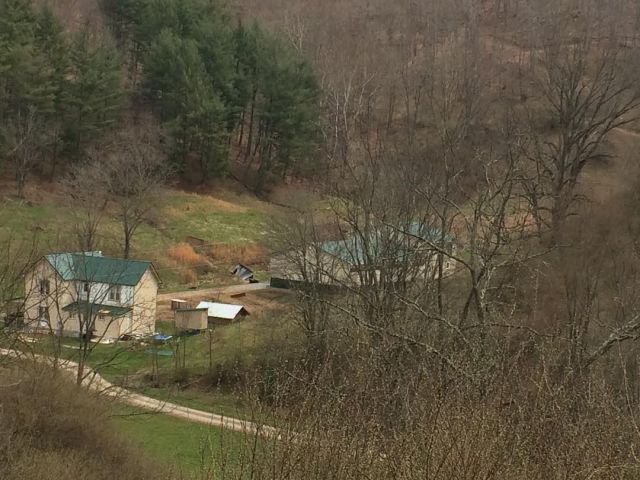
Be cause it was so nice today, David and I decided to go on a hike up one of the hills on the property (with baby in tow). The farm is looking better all the time. The siding is almost done (slow contractor) and I have to say the matching color scheme is really appealing. We want to add an addition on top of the on the stone shed (to the right of the chicken coop), we still have to dismantle the old gas shack that blew away (to the right of my parents’ house and garage on the right), and the contractor needs to clean up, but it is starting to come together.

Farm

We had a picnic lunch on the pasture at the top of the hill. It was a lovely time, despite having to constantly wrangle our nine month old so he didn’t eat grass, bugs, or desiccated cow pies.

Hilltop pasture

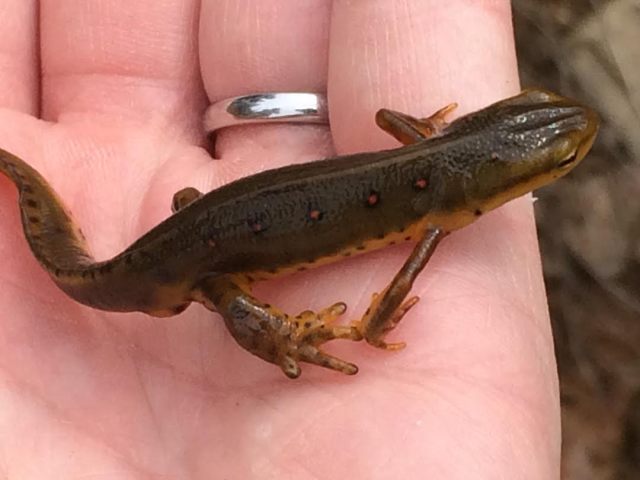
Upon returning to the house, we decided to walk up to the pond beyond my parents’ house. In the overflow stream, I found a bunch of Red-spotted Newts. They are so cute! I would have been in heaven catching them as a kid. It is lovely to see these little guys. It is a sign that the land hasn’t been chemically contaminated or polluted when they fracked for gas.

newt2newt1

Things are moving forward and I am looking forward to learning more about this property.

One Isn’t the Loneliest Number

Well folks, we are down to one rooster. Yesterday we slaughtered 2 of our remaining 3 roosters. We banded the rooster (put a zip tie on his leg) who didn’t want to be caught after the wind storm earlier this week to make sure he would end up on the chopping block. After he was gone, I looked at the two remaining and selected the bigger of the two as the next candidate for slaughter. I was considering waiting until after dark to put the remaining rooster in with the hens, but he was clucking in a distressed way and pacing around in the pen in a dither. So I caught him, with a great deal of squawking, and dumped him in with the hens. He immediately jumped on one the leghorn hens and then tried to mount one of the Dom crosses. She wasn’t having any of that and chased him off. The leghorn hens were more accepting of his attentions but none of the Dom/Dom crosses wanted him to mount them. Things finally settled down and no one looked the worse for wear. 


From the get go, we knew we would be culling our extra roosters and turning them into dinner. Why let all that feed that we’ve put into them go to waste! What we were lacking was some know how and the stomach to proceed. The final decision that we needed to start whittling down our pack of roosters came while we were free ranging them. A group of the leghorn roosters were continually going about 1/8th of a mile down the lane to the neighbors’ house and were raiding their bird feeder. Since then, all the leghorn roosters had been confined and fed a little extra to fatten them up.

I started to look forward to learning how to process our roosters. Before pulling a knife out of the butcher block and going to work, I looked around for resources to study and people who could possibly help. I talked to Bobby (the neighbor who keeps his cows on our pasture) and he usually has another neighbor help him with processing his chickens. That neighbor also skins his chickens rather than plucking them. We prefer to have the skin, since it adds flavor to the broth we make, so I didn’t want to learn how to process them using that method. So I looked up several online resources. I watched maybe half a dozen videos of how to process a chicken on YouTube, and read many more descriptive blogs.

Please note: the resources I reference in this paragraph have graphic pictures of processing chickens. Please do not open them if you have a problem with such images. Two resources that I found particularly helpful were Justin Rhodes’, from Abundant Permaculture, instructions on How to Humanely Butcher Your Own Chicken Dinner and a post from Backyard Chickens on Killing, Plucking, Eviscerating, & Cutting Up Your Chicken – Graphic!

I also consulted a friend from our old church in the city on for any tips she may have on butchering chickens and what tools she favors for the task. She recommended a killing cone (as the two resources I mentioned above do) and having a straight bladed killing knife and a round tipped evisceration knife. She also recommended I buy the tools from Cornerstone Farm and answered several questions I had after reading the resources above. Thanks Diane! I bought a killing cone, a killing knife and an evisceration knife and I was in business.

I started with doing one leghorn rooster one week, one the next, and I stepped up to two roosters the next week. Originally the plan was to keep General Tso, our Rhode Island Red/Dominiker rooster, and slaughter all eight of our more flighty leghorn roosters. However, General Tso started to become aggressive, not only to strangers (he jumped on the contractor who has been doing our roof and siding back several times while we were free ranging the chickens) but to the people who where caring for him and his hens. He developed a particular hatred for my mom, Georga. The first time she saw him full grown he was already in a high dither because we were cleaning up the yard and moving things around. He pranced up to my mom and challenged her and she flapped her jacket at him and chased him a bit. He never forgot that. A little while after that, we had to go away for a pre-Christmas gathering and my parents said they would care for the chickens. My mom went into the coop to care for the chickens and gather eggs. When she was bending over to get an egg, General Tso went for her face and kept attacking. She wasn’t able to get away until she got ahold of his neck and nearly choked him unconscious. After he attacked other family members a few more times we decided he had to go. On the fifth week, I killed one Leghorn rooster while I instructed my mom on slaughtering and processing a chicken on General Tso. She enthusiastically helped. She even made up a new verse to “She’ll be Coming ‘Round the Mountain” for the occasion. 

🎶And we’ll kill the old red rooster when she comes🎶

Between this, that, and the other, that was the last time, before yesterday, that we slaughtered any roosters. We’ve decided to keep the last rooster as protection for the hens, but if he loses his fear of people and starts attcking, or is hurting the hens, into the stew pot he’ll go. 

We are glad to finally have only two groups of chickens again, and hopefully no more slaughtering until our current batch of chicks grow up enough to gauge their personalities, and they reach slaughtering weight. Now our original tractor stands empty. We will be dismantling it to make something that won’t be so easily flipped by a strong gust of wind. 

Seeing the open pen gave David a bit of a start this morning. He momentarily thought the roosters had all escaped. 

The Buffingtons have Arrived!

Or to be more accurate, the Buff Orpingtons have arrived. Buffingtons is what Grace keeps accidentally calling them, but I kind of like it, so I think it will end up sticking.

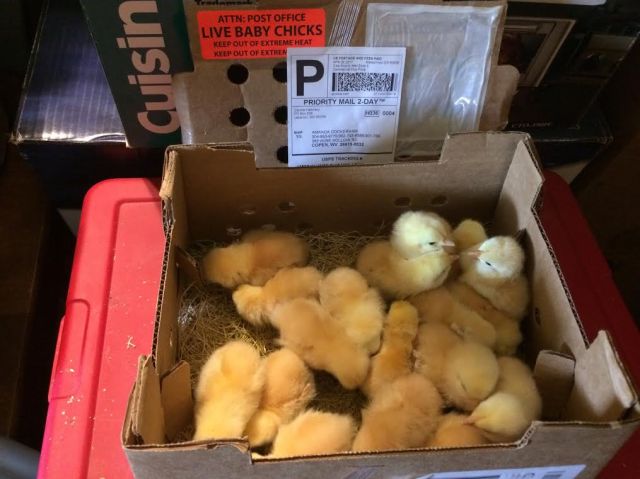
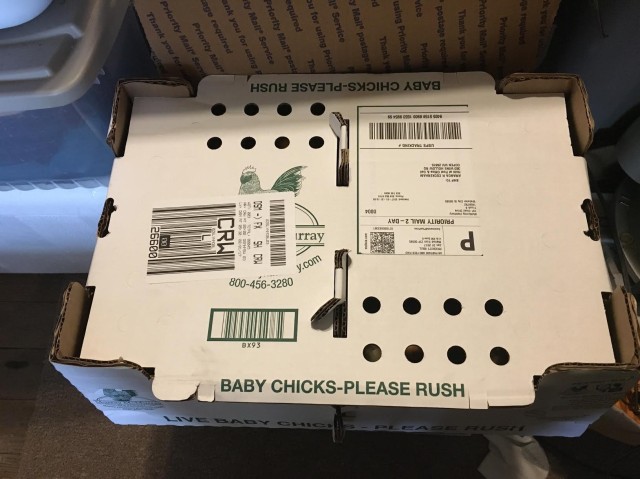
This morning at 7:30 I got a call from the post office saying our chicks have arrived. The mail carrier said he could bring them, but they wouldn’t arrive until the afternoon. So, Grace and I drove down to the post office to get them. They came in a cardboard box and were peeping madly – or so I’m told (I’m high pitch deaf and can only hear them if I’m very close to them).

chick-box

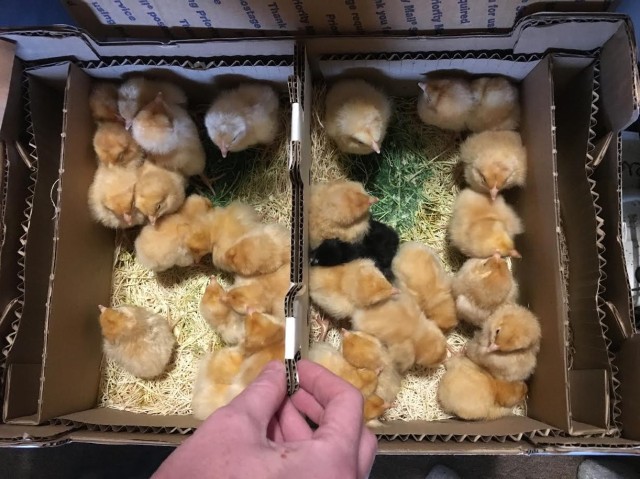
In the box, we had 31 Buff Orpington chicks (Yay free chick! We ordered 30) as well as a free “rare exotic chick” who is mostly black and has feathered feet. All the chicks arrived alive.

chick-in-box

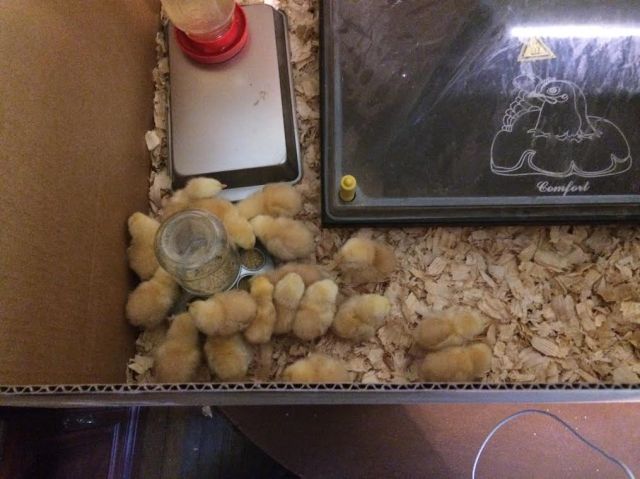
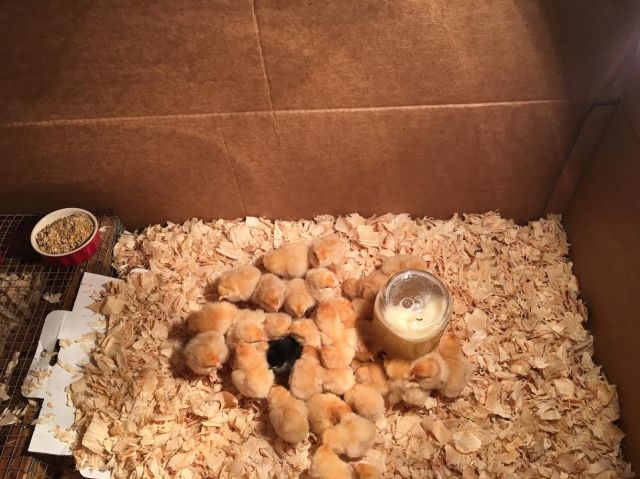
Because the hens have not been ousted from the coop yet, and the next several nights will be very cold we decided to set them up in a box in the living room until it warms a bit and we’ve had time to clean out the chicken coop and turn it into a brooder. Yesterday, some of our Amazon Subscribe and Save order came in a 2ft by 4ft box. Perfect for a temporary chick brooder!

chicks-in-brooder

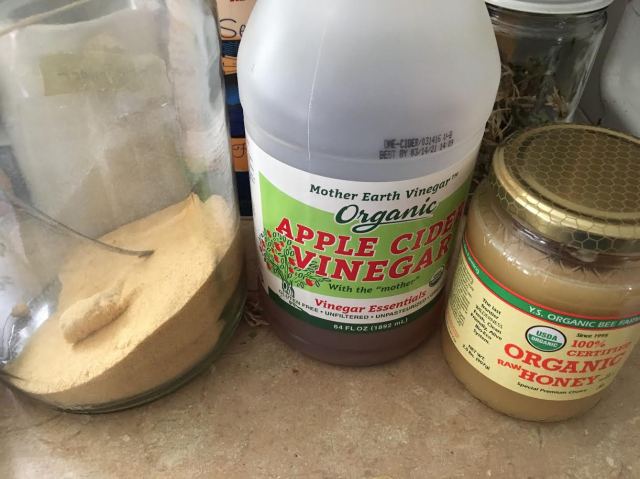
We gave them some feed, grit, and some of what is called “miracle water”. This water has a spoonful of honey, some powdered garlic (the recipe called for a crushed, fresh clove but powdered was all we have on hand), and a little big of apple cider vinegar. It is supposed to help them recover from the stress of their journey across country via the postal system.

miracle-water

Since I’m an impatient person, I did some research on how to sex day old chicks by looking at their primary flight feathers. According to my best guess as an amateur, internet-trained chicken sexer,  we have 17 pullets (hens) and 14 cockerels (roosters) Buff Orpingtons. The free chick also looks like a rooster, and I think he is a Black Silkie Bantam. We’ll just have to see how well my guesses turn out. Hopefully, they all survive. We have one little rooster who is looking rather droopy and we’ve been giving him water and a little bit of yogurt to help brighten him up. Otherwise, the chicks seem to be rather spunky and lively.

So, you may be asking why we chose Buff Orpingtons. When we went looking for the type of chicken we would keep and breed on our farm, we were looking at several different characteristics that would make a good all around homestead bird.

  • Dual purpose – good for eggs and meat
  • Heat Tolerant
  • Cold Tolerant
  • Good Disposition
  • Likely to Sit on Eggs
  • Good at Foraging

One tool that was an enormous help to us was Murray McMurray’s Chick Selector. It allowed you to enter the criteria you are looking for in a chicken breed and narrow your list down to a few breeds. The each of the characteristics the selector allows you to input has five options; Poor, Good, Better, Excellent, Best. In order to find a breed that makes a good mother hen, we had to select for a slightly less efficient forager than we originally wanted. The selector narrowed it down to three breeds; Buff Orpington, Buff Rocks, and Turken. We then did a lot of research on these three breeds and decided that Buff Rocks were out because they were less likely to stay contained in an open top paddock. Turkens and Buff Orpingtons were coming out pretty even on almost every characteristic. We ended up choosing the Buff Orpington for two main reasons. One, they are a more popular breed and there is a larger gene pool to pull from. Two, they are just prettier birds. Turkens may be good heritage breed birds, but their naked necks just make them look hideous. However, if it turns out that we don’t like the Buffingtons much either, one person suggested you keep trying different breeds of chickens and culling them until you find a breed(s) you like. It sounds like a good plan to me.


Free Range

Our chickens have been growing rapidly and one of the effects of their larger size has been an increased ability to implement their desire to roam. It’s hard to fence in a bird that can do a flight assisted hop over a fridge. It’s like fencing in a cat that has more feathers.

So after weeks of clipping feathers (Useless!), getting taller fencing (Did I hear the chickens laugh?), and chasing them back into their yard (A great workout that resets after about 3 minutes.) We yielded to the inevitable and moved their fence.

Now it encircles the front porch. The chickens had taken to camping on the porch in the late afternoon when they start anticipating their evening meal. Resulting in massive amounts of poop on the porch. Fortunately they took the hint!  So we might actually be able to fence around areas we don’t want the chickens and let them free range.

Initially I was worried about free ranging. After all the Leghorns are skittish. How in the world would we catch them each night? Turns out it is more a matter of they catch me.

Every time I go outside! They all run over hopefully and cluck at me while I’m working. Good thing they are smarter than the dog and cats about staying out from under foot. They are also wary of my car so if I get in it they scatter back to their grazing. Otherwise they pretty much follow me. I have a lot of very feathery stalkers. 

Potato Harvest

As always on the farm there are about 10 things happening at once. Most are the daily rituals like feeding the chickens or household maintenance. But we do have long anticipated events arise occasionally. Like harvesting the potatoes from our experimental potato barrel.

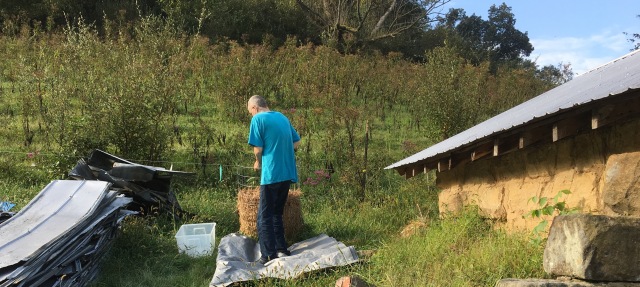
This is a round wire frame with layers of straw and dirt into which the seed potatoes were planted. Harvesting from it was fairly easy and only took about 30 minutes because we just unwrapped the wire and began sifting through one layer at a time.

Our neighbor says this has been a very bad year for potatoes. He managed to grow about half of what he planted. In our potato barrel we grew about a third again what was planted. Not a stellar yield but an improvement. We also harvested a little late so we lost a few to bugs.

All and all our first real planting success. The wire barrel went into storage for next year and I expect we will build a few more since it grew well and beats digging for potatoes all hollow.

Road Trip!

Around here they often seem to have shopping added to them. For example we made a trip to the old house for stuff and went to Costco and my favorite store Ikea.

Why is it my favorite store? Well for one thing you get free coffee if you’re an Ikea Family member. But maily it is because the stuff is cheap and sturdy (if you avoid the polyboard.)

So for cleaning and organizing the farm house it was the desired solution. However since it is about 500 miles round trip it is not something you can just do. You have to plan ahead and get the most out of the area.  

In one way I suppose this ‘shopping day’ effect is traditional for homesteaders. After all going to town in a wagon would probably take about as long as it took me to drive to the old house since 80 mph wasn’t exactly feasible for a horse. 
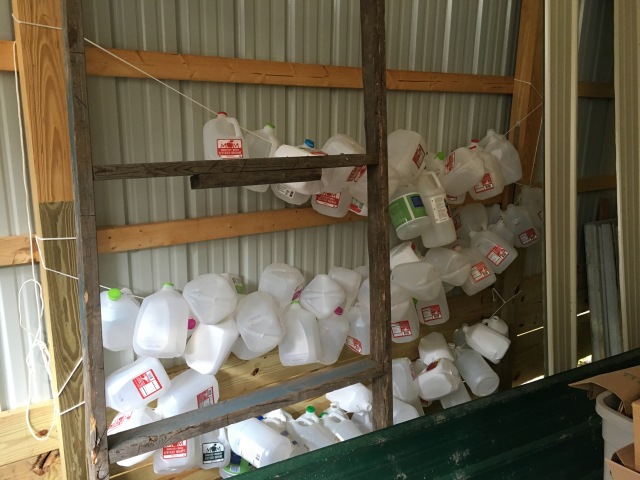
Got Milk…Jugs?

Yesterday proved unexpectedly busy as my brother’s promised job finally materialized. Around here it seems to be normal to call people the day you want them to start working. I often find myself wondering if any of the locals have heard of the odd concept of planning ahead.

Anyway that threw off our plans as my brother had to shift focus abruptly. So my big project was moving the milk jugs.


We’ve been saving them in hopes of getting a large supply if walnut syrup next year. To store them I’ve been hanging them under the front porch. However that was both unsightly and impractical because the rope had a tendency to stretch leaving the jugs dangling too close to the dirt.

Now I have them hung on a clothes line in the barn. Best of all, this tiered system uses the vertical space so I can keep collecting.